Storage Crate turned Side Table

I have a garage full of projects just waiting for me to jump back in – furniture to be refinished, items to be repurposed, and a few things that need a major overhaul. Slowly but surely, I’m coming out of a long winter’s hibernation (and getting out of the kitchen a bit!), and I am so excited to get my hands back on my sander and paintbrush.

I picked back up where I left off last year, with an idea to turn a sturdy wire storage bin into a cool, industrial-like side table. I snagged several of these storage bins after one of my craigslist searches for anything that catches my eye. A warehouse here in town was cleaning out, and I cleaned up!

wire crates

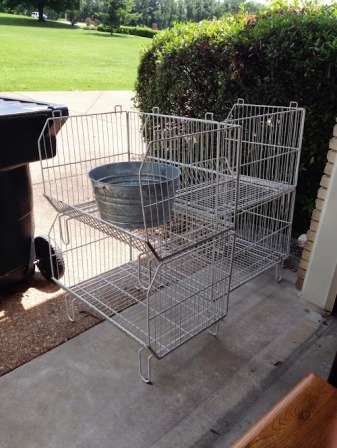
Original purpose – stack them up in your garage for storage. Me – add a table top and have a cool place to stash kid’s toys. My intention is actually to use it as a TV stand in our playroom and toss in the Kiddo’s various bits of sports equipment, but until I give the playroom a major renovation, you won’t be getting a picture of that anytime soon.

 Wire Crate Table

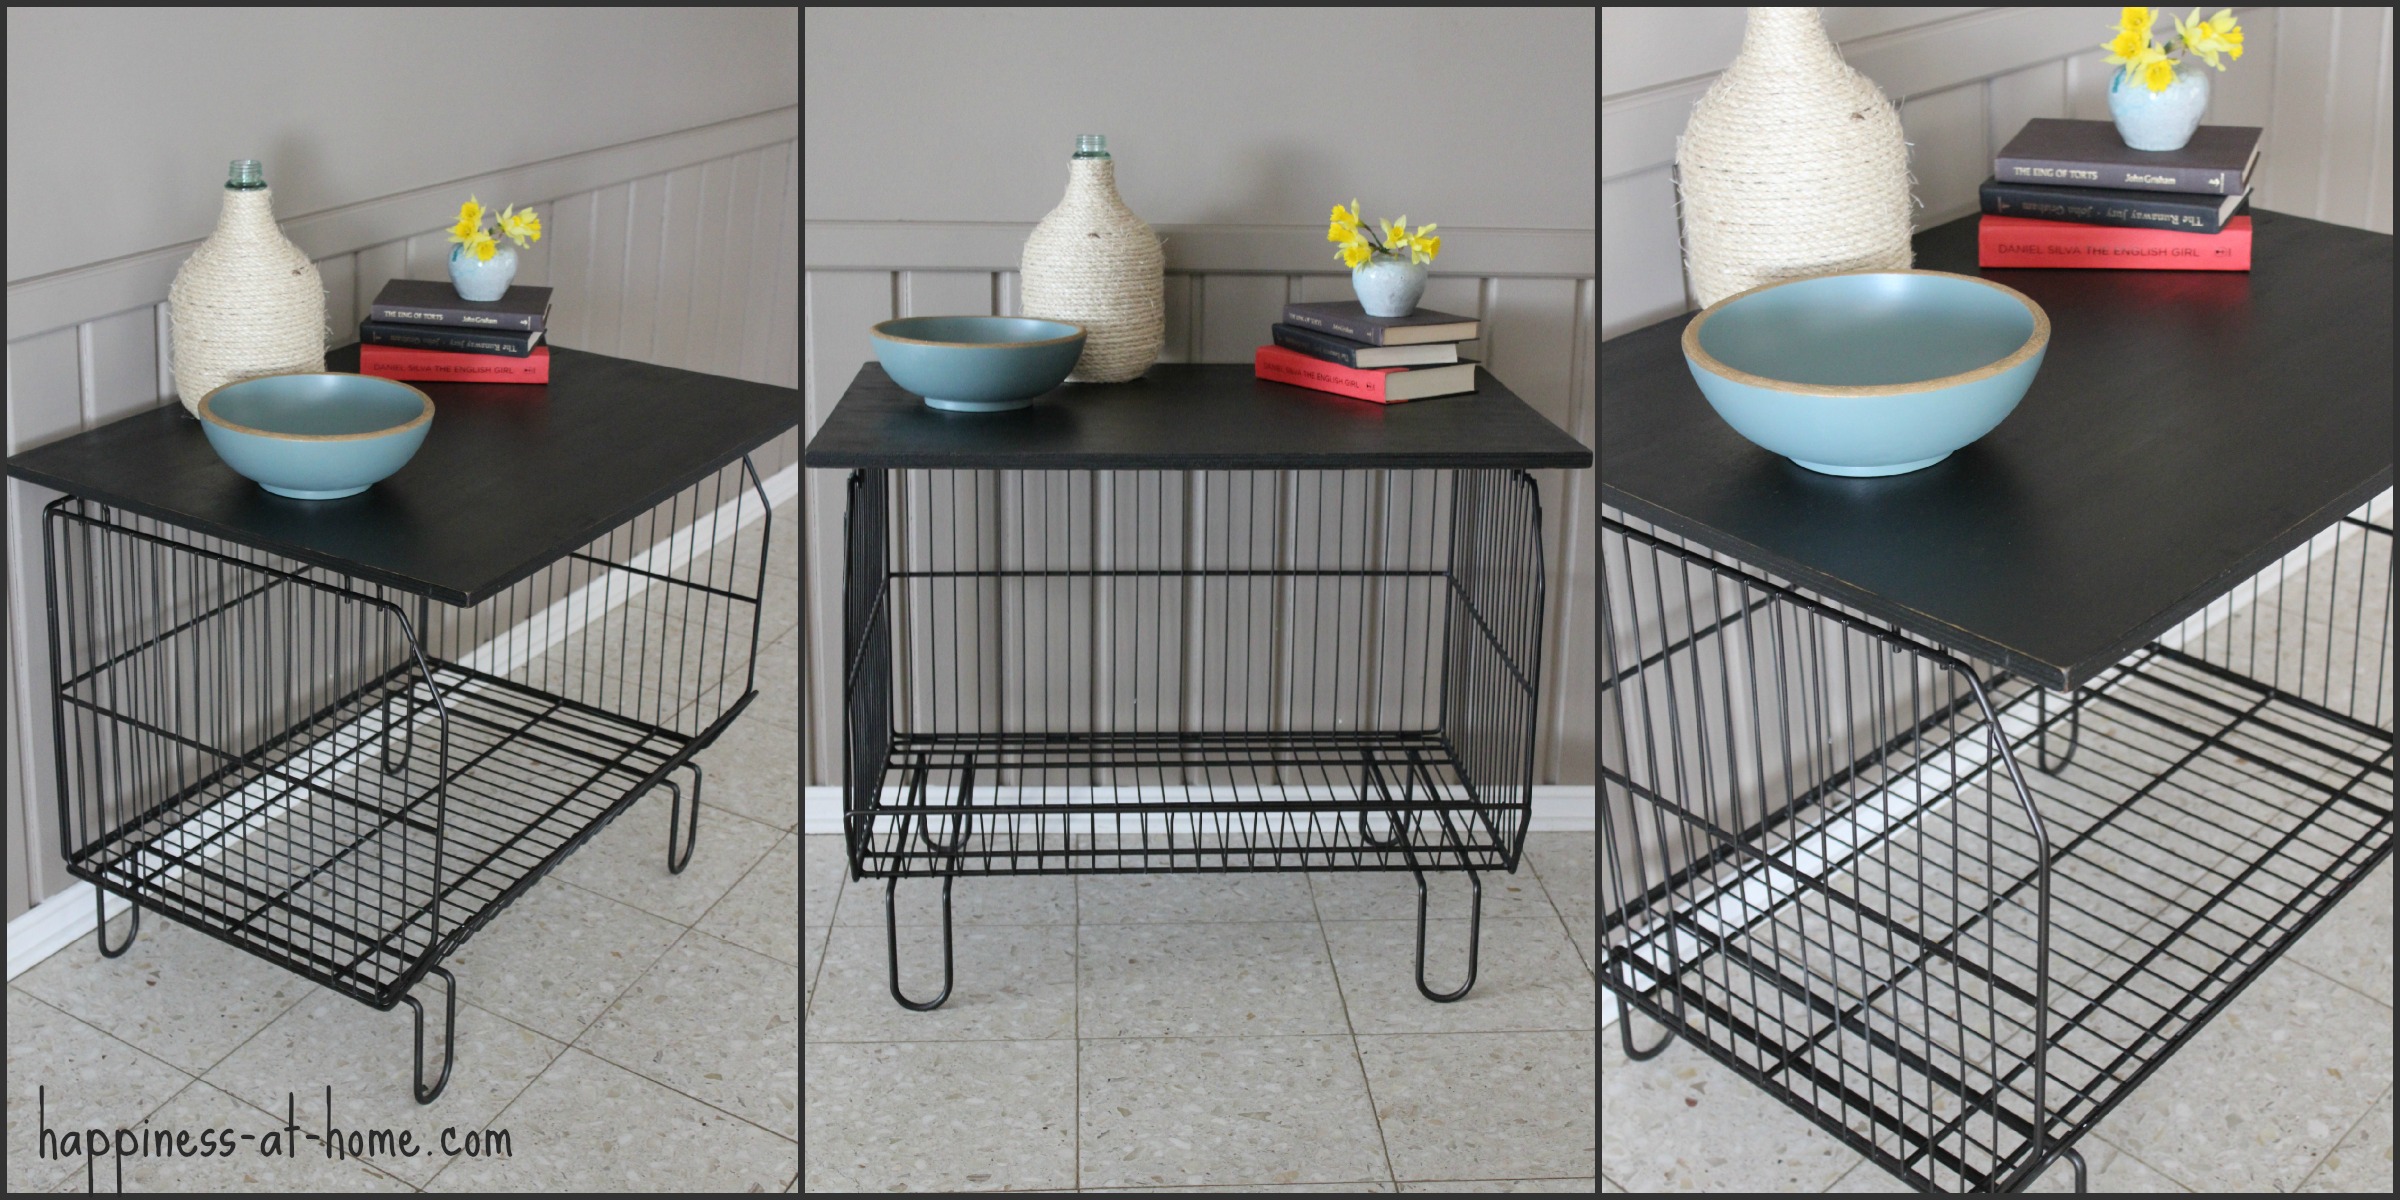
I’m really happy with the result, and think this will be a versatile piece that I can move around where needed. For an easy DIY project, it’s a keeper. Here’s my how-to:

  • I spray painted the wire crate with Krylon Oil Rubbed Bronze. I love how it looks, but if I do another one, I’ll seriously consider just touching up the white color that’s already there.  With a wire crate, there was so much waste of spray paint, that I’m not sure it was worth trying to change the color.
  • I measured the size of the top I needed, and then went to my favorite Home Depot and purchased a 3/4″ thick piece of pre-sanded plywood. I had them make a couple of cuts for me, and then my handy dad was nice enough to make a couple more.
  • When I brought my table top home, I went ahead and sanded it even though it was a pre-sanded piece. I wanted to make sure it was nice and smooth, and the rough edges from the cuts needed a little attention. I used a 100 grit sandpaper.
  • The table top was painted with 2 coats of flat black (my favorite black is Black Suede by Behr), and then lightly sanded with a 220 grit sandpaper. I did a little more on the edges and corners to give it a distressed look. Then I wiped it all down with a damp cloth.
  • I wiped a Golden Pecan stain over the entire table top piece and let it dry overnight. Then I used a wipe on Polyurethane  (2 coats) to seal it. The black distressed paint with a light stain looks great with the oil rubbed bronze color of the crate.
  • Finally, I was ready for assembly! I used U-shaped brackets from the closet section of the hardware store to affix the underside of the table top to the wire crate. And done!

The 3/4″ plywood is sturdy enough to hold our TV and the storage works great for larger toys. I may go ahead and do another one for a bed-side table when we change over to a “big boy bedroom” for the Little Man.

Rope Wrapped Lampshade

I’m definitely a can’t sit still kind of person. Just like my Little Guy, I always have to have my sticky little fingers in something. Even when I know I need to take some time for myself and just sit and relax, I still have to be multitasking in some way. As long as I can keep my hands busy, I’m happy.  That’s why I like easy little projects that I can do inside while I’m having my “me time”.

This lampshade is one of those easy projects.  I do love wrapping things in rope and twine (see my how-to for twine wrapped wine bottles here), and when I was gifted some plain jane bell-shaped lamp shades from the 90’s, I immediately ripped off the old fabric to get down to the bones.  I decided to try wrapping rope around the shade to get that organic look that I love.

I grabbed my hot glue gun and got to work.  I started by applying a thin line of hot glue all the way around the top ring and attaching the rope. From there, I wrapped it around, applying glue to every other spoke on the lamp shade to adhere the rope. All in all, it was pretty easy and took a couple of hours. My shade used two 50-foot spools of quarter inch sisal rope from the hardware store.

I love how it turned out; it’s the coolest lampshade! I also discovered that upside-down it makes an amazing basket! And, for when the weather gets warmer, I’m thinking about getting a light kit to make the shade into a free-hanging fixture for our patio.

Painted Wooden Bowls with Metallic Accents

Painted Bowls

I was in desperate need of a project. It didn’t have to be a big one, but after being stuck inside the house because of gray, cold days, I needed to slap some color on something! So I took a look around at my stacks of “to-do” and my little eyes spied a stack of wooden bowls I have been meaning to paint.

I picked up the whole set of wooden bowls at an auction for just a couple of dollars. They were dirty, and dry, and chipping and peeling – just the kind of stuff I have a tendency to fall in love with. I thought they would be awesome dressed up in bright colors with touches of gold.  So I grabbed some different paints and a Martha Stewart Textured Metallic (in Pyrite) I found on clearance at Home Depot and got to it!

First, I gave the bowls a quick sanding to make sure all of the old shiny finish was gone, then a wipe with a damp cloth. Each bowl got two to three coats of paint, and as always, several thin coats works way better than trying to paint it on too fast and too thick. Once they were dry, I used the metallic paint on the edges (and the inside of one bowl). The textured metallic paint was a new experience for me, but once I figured out the best way to spread it on, I was really happy with the result.

It was so nice to actually sit and paint something again, and now I have a cool collection of colorful bowls!

Painted Bowls Before and After

Up-cycled Shopping Bags

Gift bags

So many stores are using those nice paper bags with handles these days, and I hate to throw them away (surprise, surprise), so I fold and stack them nicely in a drawer. Well, this time of year as my shopping trips increase, so does my stack of bags!

Instead of buying gift bags this year, I decided to make good use out of all the shopping bags I had accumulated. An easy arts-and-crafts day, and, voila, a nice new stack of holiday bags!

First, I rummaged through my paper drawer and found some cardstock and some Christmas scrapbook paper. Then I grabbed my trusty paper cutter ($5 at Hobby Lobby with a coupon!!).

I measured the area on the bag that I needed to cover (i.e., the other store’s logo), and cut a square of cardstock to fit. Next I cut a bunch of 1/2″ strips out of my scrapbook paper in varying lengths. For my bags, I was able to use a 6″ large square and strips at 5″, 4″, 3″, 2″, and 1″. I glued my strips onto the larger square in the shape of a tree, and then glued the whole thing onto the bag. I placed the bags under some heavy books to make sure they would dry flat, and done!

Gift Bag Upcycle

A nice, easy project to take my mind off all the hustle and bustle!

Lamp Post to Lantern

Lantern Makeover

Don’t you love holiday catalogs? Pier 1, Pottery Barn, Restoration Hardware – those are the visions of sugarplums that dance in my head. I don’t actually need everything I see, and to be honest, I look at the catalogs more for ideas than anything else. So many future DIYs and tablescapes right there at my fingertips.

Recently, I came across several ads for these beautiful lanterns filled with Christmas lights or ornaments, and while I wasn’t willing to pay the hefty price tag, it did remind me that I had an old broken lamp post light hanging out in the garage. More than a year ago, we knocked the front lamp post while mowing and it snapped the base of the light. We replaced the lamp fixture and stuck the broken one in the garage.  Good thing I’m such a pack rat, the lamp worked perfectly for a little lamp-to-lantern DIY project!

I was able to take the broken base off the lamp and remove the inner light bulbs and parts. From there it would stand on its own like a lantern, but it needed some prettying up. I took the whole thing apart to clean the metal and the glass, then laid all the pieces (except the glass) out on cardboard in the garage.  A few coats of leftover gold spray paint (same Rustoleum Pure Gold I used for my IKEA Table), and it was ready for greatness!

So far I’ve used it on my Thanksgiving table with glass pumpkins and filled with LED battery-operated lights in a Christmas arrangement. Wonder where it will pop up next?

My First IKEA Hack

IKEA Vittsjo Tables

I’m not exactly sure how I made into my 30’s without ever buying anything from IKEA, but here we are. I grew up going to auctions, so whenever I needed a specific piece of furniture, off to the auctions I went! It’s a great way to spend a childhood – people watching and scoring great deals. Plus, I feel like I have an amazing house that has been built piece by piece, and those pieces have stories to tell. But, alas, my method finally hit a snag.

I had moved some furniture around and decided I needed a proper coffee table for my living room. Of course, decisive girl that I am, I knew exactly what I wanted, but I just couldn’t find it.

Our front living room/formal living room (also known as the only space in our house that is always clean!) is my girly space and a place I can go to unwind.  I wanted a coffee table that wouldn’t compete with the other pieces in the room. I didn’t want a heavy wood table; instead I was thinking about something with a glass top to keep it open, and gold colored metal to match some of the other vintage accents in the room (AKA brass fireplace screen).

After I realized that my normal antique auctions weren’t going to work, I turned to internet shopping. Yay fun! I found what I wanted! For $300 (or more) it could be mine at the push of a button. Ha! Nope. Back to the drawing board.  I had never ordered anything from IKEA before, but after seeing what other people could do with their furniture, I decided to give it a look. And guess what – right there was exactly what I wanted!

I decided on some interesting nesting tables with clear glass tops and a bottom shelf. For $60 (plus $15 for shipping) I thought it was worth a try. Having never gone the IKEA route before, I was a little worried about what would show up to my door, but I was pleasantly surprised. My tables arrived in a timely manner and without any damage. They were super easy to put together – took me less than 30 minutes! Overall I was pleased, and ready to get painting.

I used 4 cans of Rustoleum “Pure Gold” spray paint.  If I had been more patient and not tried to paint on a breezy day, I probably could have gotten away with 3 cans, but I guess that’s just not my style. The dark “wood look” bottom shelf didn’t really fit with the now gold table, but instead of also painting it, I decided to go with a more interesting option, and covered the shelf with some fabric. Just a little spray on adhesive (I use it all the time – probably should own stock in spray adhesive), and the fabric went on with no problems.

And, ta-da!

IKEA Hack

I love how my new table feels a tiny bit glam mixed with a little vintage. It’s perfect for what I needed.

Courtyard Patio Make-Over

Courtyard

One of the things that drew us to our house was a unique gated courtyard in the front. It almost gives the house a Spanish style (ooh, we sound so exotic!). The courtyard is shady in the morning and overlooks a cotton farm across the street. It’s where I grow my herbs and where we have a leisurely breakfast on the weekends.

The courtyard was a combination of paved aggregate (like our driveway) and a flagstone patio, and overall a quaint little place that is one of my favorite things about our house, but over time, it has started to look shabby. Stones were coming loose, the mortar between stones was popping out, and I was fighting a losing battle with the weeds. However, my biggest concern was that not only was the courtyard becoming unsightly, the unevenness and loose stones were making it a bit of a danger. Time for a change.

We decided to go with some paver stones I found at Home Depot. The color was much closer to the color of the paved aggregate (which we were leaving), and they were nice and flat, so no more tripping! I love the new look of the pavers, and the change seems to fit my idea of a courtyard so much better than the flagstones.

DIY Patio – Things to consider…

  1. DIY is a loose term here. It’s more likely this needs to be a DI-Friends, DI-Family, or in my case, DI-Dad. What I’m trying to say is that this will go so much better if you don’t actually try to do it all by yourself.
  2. Think about the time of year. I, unwisely, got it in my head to attempt this awesome project in August. About 10:00 every morning our patio was in the full summer sun until 5:00pm. Not my smartest move. (On the flip side, don’t pick winter either because having to use a wet saw to cut the pavers will freeze your fingers off!)
  3. What stones/pavers to pick. I picked my pavers based on the patterns at the hardware store and had them delivered. We got started and then dad says, “hey, did you know those big ones are 60 pounds each?!” Nope. I did not know that. Sorry dad, I’ll buy you a back massage.
  4. Do you have a truck? A friend with a truck? I only ask because if you have to remove anything (like our whole patio of flagstones) you’ll need a way to move it. Also, you’ll need to know where to move it to. We took the nice looking flagstones and made a decorative wall around some of the back yard landscaping and hauled the smaller stuff to the dump.
  5. This may take longer than you think. Here I am thinking we’d have this done in a week or so, but I guess I’m a big dreamer. It took more than a week for us to get the old stuff out, a few days to prep the base, and a few days to lay the pavers. We were working mostly on weekdays after work, and the heat was taking it out of us, but all in all it took closer to 3 weeks.

In progress collage

DIY Patio – step by step, day by day, week by week…

  1. Demolition/Prep – Good golly I hope no one else has to do as much demolition as we did. I figured that since the flagstones were coming loose, we would just pop them out and be left with a nice hole. Ha! After a week using the pry bars and sledgehammers, we finally had the old stones out and could put down a layer of paver base (like a small gravel). You’ll want to make sure it’s level and running very slightly away from the house. We ran some strings and hung a few line levels. We left the string and levels in place as we worked to make sure we stayed on track.
  2. Once your surface is prepped with a good layer of level paver base, you can lay stones. I recommend practicing your pattern out of the way a bit until you get the hang on of. Taking pavers back up because you laid them wrong is not something you want to do. Lay down your pavers one at a time and check to make sure it’s level. If not, wiggle it around a bit or lift up the low side and toss a handful of gravel under. A rubber mallet is super handy on this step.
  3. Start by laying all of the pavers you can without having to cut any. For us that meant laying everything except the outer edge where we knew we had to cut pavers to fit against the aggregate portion of the patio. Once you’ve gone as far as you can, rent a brick saw from the hardware store to cut the edge pieces. The brick saw is messy and will spray water and concrete dust everywhere, so don’t set it up right next your house!
  4. Last step! Sweep paver sand (for leveling) over your new patio. I found a push broom to work best. Pour the sand in several places over the patio and just sweep it back and forth. The sand will fall down between the pavers. Once you think you have all the cracks filled in, lightly spray the patio with water and watch all your hard work disappear down into the cracks. Repeat.  You’ll have to sweep sand several times to really get the look you want, and you will probably have to do it again in a couple of months, so keep some sand on hand.

There were several times during this project that I just wanted to stop and hire someone to finish it (and I know the Hubby felt the same way). I didn’t think it would ever get done, and I was just plain tired. But I’m so glad we pushed through and now have this new patio to enjoy! I think it’s time to pour a glass of wine and head outside!

Two-Tone Dining Table

As you may have read back in an earlier post, I have a habit of picking up furniture I deem worthy of rescuing, and this table was no exception.

I came across this table while trolling the furniture section of Craigslist, and at $35, I thought it was a steal and would make a cute little breakfast table.

white dining table before

From the picture posted online (above), it looked like someone had already primed it, and my plan was to paint it an antique white and give it a light distressing. But plans change. When I got the table home and really gave it a good inspection, I realized a couple of things: First, the primer job was pretty terrible, and second, this baby was quarter sawn oak and would be amazing if I could restore it!!

So, plan #2 – Strip, sand, and stain to restore the table back to its original beauty. But again, plans change. Stripping the primer off this table was a nightmare.  My mom and I managed to get the top surface pretty clean, but the table base was just not having it.  I could sand it down and smooth out the primer drips, but to completely remove the primer would have taken weeks (and my sanity!)

Ok, so plan #3 – Restore the top and go with the distressed antique white on the base. Finally, a plan that stuck!

white dining table after 1

The base is my favorite white – Swiss Coffee by Behr. The top is stained with a combination of Minwax English Chestnut and Early American. The entire piece is finished with a rub-on polyurethane.

When all was said and done, even through all of the frustrations and changes, this table has turned out to be my biggest accomplishment and favorite furniture make-over.  I couldn’t just sell it to a stranger, so it was gifted to my brother and his wife as they build their new home together.  They tell me that it fits in perfectly with their style and they love it, but they have been given specific instructions to send it back this way if they ever decide to make a change!

Framed Monogram

DIY Framed Monogram

I have a super easy DIY for you today. It’s nothing profound, just my take on the framed monogram I seem to be seeing everywhere these days. I really like the look of the ones I see in stores, but figured I could easily make one for myself!

I have mine nestled in a bookcase to give a layered look to the styling, but you could just as easily hang it on the wall or add it to your mantle.

All you need:

  • Frame – mine came from a $2 box of frames I got at an auction!
  • Burlap or other fabric for back – I used burlap from the garden section of the hardware store. I like the more rustic look and it’s super cheap!
  • Letter – I used a chipboard letter from the craft store.
  • Paint
  • Hot glue gun
  • Spray Adhesive – I keep this stuff on hand in bulk! Always using it!

Paint your frame and letter in the color(s) of your choice. Let dry.

Cut your fabric background to fit in frame. Spray the backing of your frame with the adhesive and attach the fabric. Smooth it down, and let it dry.

Assemble your frame (you won’t need the glass). Center your letter in the frame and use the hot glue gun to attach it.

NOTES – Make sure your letter fits in your frame before you get started! I had to go back and get a smaller letter. Oops.

Easy DIY Outdoor Tablecloth

Outdoor Tablecloth

I love this time of year in my home magazines (but, I probably say that for every season!). Looking at tranquil outdoor spaces – perfectly set tables with real linens and china and magnificent centerpieces. I just want to go there. It really gets my mind thinking about our own patio, and I start dreaming about what it could be. Then I’m snapped back to reality, and I think about kids’ toys all over the backyard, mosquitos swarming, and summer storms brewing. Not so tranquil, huh?

Ok, so leaving a perfectly arranged table set up all season long is not in the cards for us, but I do love that look that uses real table linens, and I know I can at least do that when we have people over. I was having a hard time finding an outdoor tablecloth that was real fabric, had a hole for our umbrella, and wasn’t too expensive. But, I found a solution!

Did you know that those curtain grommets you can use when making your own curtains will fit around most patio table umbrella poles? Now you do! Here’s my easy DIY project for turning a regular tablecloth into a tablecloth you can use on your patio table if you have an umbrella.

You’ll Need

  • Tablecloth of choice
  • 1 curtain grommet (they usually come in a large pack)
  • Scissors

Find the center of your tablecloth and mark it. I usually fold my tablecloth in half, then fold in half again going the other way. This gives me the exact center of the tablecloth on the folded corner. Then I snip a tiny bit so when I unfold it, there is a little hole in the center.

If your grommet pack came with a template to trace, use that to trace the circle that you will cut.  If you don’t have a template, use one of the grommets and trace the inside.  Whatever you use, line it up with the center of the tablecloth that you marked. Cut out your circle.

Follow the directions on your grommet to snap it together over your hole. Done. Easy peasy!

DIY Outdoor Tablecloth

Outdoor Tablecloth 2